Thursday, January 20, 2011

8 pannel project (Last assignment)


My inspirartion for this was a game a friend and I are wanting to create.
I have the character designs for the 2 main characters, Akira and Miyabi. I've included the 2 ages you see the characters in the game also.
Then I have the English and Japanese logos. The Japanese one says Monokuro No Hana wich translates to Monochrome Flower.
Then we have 3 of the backgrounds. These are all from the internet, but I retouched them, used the protocols and blurred them a little. I used the blur because the main forus will be on the characters, which I will draw and put in later to go with the story.
I've got the outside mansion and inside mansion shots. This mansion belongs to Akira.
Then the classroom shot, because this game starts with the 2 main characters meeting in the classroom.

This actually turned out to be more than 8 pannels, but I still like it. The more the merrier, right?

Newspaper-Final Exam

My inspiration for this project was school moments.
I thought of what I wanted to remember from the year so far.
I am gradding this year, so I picked things that I want to remember.
Picture choice:
Bears: Although I am not into sports I want to remember the sports teams because they are a part of the school and are important to school life.
Rodeo- Reminds me of Mr.Smith. He was my Japanese 10 teacher and he also runs the rodeo club.
Play- The School play practice because I was in the Drama club, but I dropped out. I do want to remember the fun times I had while I was there.
No-Shave November: Mr. Capmbell is the Anime Club sponsor and also my Japanese 11 and 12 teacher. It is nice that he did no-shave November to inspire students to do the same.
Soccer- I have a friend who is good with soccer and is in the soccer acadamy. Again, sports make the school fun for some people/
Terry Fox Run- The last one I will be in (Cause i'm gradding) and I walked with a nice group of friends.
Halloween- Probably the last one I will spend with all my friends because they will be moving away to go to school. Also, I made Shannon's costume and she looks amazing!
Winter Formal- I had fun at this and I really want to remember it. The first school dance that I actually had fun at.
Arts For Equador- I sang a song with a friend(who was playing the guitar). That will probably be the last time i'll be able to participate in something like this.

I want to remember highschool because it has really opened up the world for me. I was able to make many friends and even start my own club. I'll be sad to grad...and i'm sad to leave this class too. I really enjoyed this class.

Monday, January 10, 2011

Art In Action

My submission for the contest ^^

Snow scene

First off i created 3 layers. Light, Dark and Background.
Then i lightened the light later and erased the sky. Then i made the sku more blue. And blended the images together.
I dodged a few parts of the snow.
Then I saved it ^^

Art Gallery idea

This is the print I would like to put into the gallery.

For what I did, please see
http://sakuraelric.blogspot.com/2010/11/green-screen-work.html

Thursday, January 6, 2011

Final Project


I chose to do the 8 pannel final project.
These are my first 2 pannels. The english and Japanese logo. They were both made completely with photoshop.
I plan on(at a later date) making this into a game walkthrough type of thing.
But for the project i'm am including my planning stages. The Charaacter designs will be taking up most of the project.This may end up being more than 8 pannels, i'm not 100% sure yet.
What I plan to include is:
1-Logos
2-Akira design-17
3-Akira design-19
4-Miyabi design-18
5-Miyabi design-20
6-Takeshi design
7-Miyaki design-16
8-Shira design-20

Mystical light


First off I darkened the image using the selective color tool. Then I created 3 layers and used 3 different lense flare effects. I blurred 2 of the 3 layers
Then I dodged behind the light on the original image to create more brightness.
I tried to make it look like there was a little reflection of the light on the water.
Then I made a black layer and changed the opacity so the image looked dark.
Then i did another black layer and erased the middle part and where the light was. This created a little darker Vingette.
Then I saved it.

Tuesday, January 4, 2011

Review-Global and Local changes

Original:
Edit:

This image was REALLY blue before. I used the replace color tool and toned it down to grey.
I used the levels and the contrast tools first tho.
The mountains were washed out in places so I used the magic wand tool to select those areas. I then copied part of the mountain to put in there. Then I made some color changes and made them more opaque and made the endes smoother.
I brought out the red in the tree a little using the color replace tool.
I burnt a little more color into the sky using the burn tool.
I made a Vignette with a black background and erased part of the image with the erase tool to create the darker edges.
Then I flattened it and saved it.

Day To Night

My take on the Day to Night assignment.

I did the replace color and toned some things down.
Instead of using another picture, i colord over the original.
I tried to make it look like light was coming from the book.

I hope this is okay for what you're looking for, if not i'll be happy to re-do it.

Thursday, December 2, 2010

Booklet


This is the cover for my book.
My theme was Anime 2010. In the booklet, which ended up being 16 pages.
My book's pages are tied together by the background. Its a Shojo screentone.
*Cover- My Hetalia Bandannas(Which came with the Hetalia anime sets), lined up in the middle to split the Hetalia text so I had half of the text and characters on each. The picture of me was taken by my dad on the day i got my grad photos done.
Sakura Elric is my online alias and my favorite name.
*Page 1- Table of contents. I didn't want a list because it looked to plain and I like the randomness. Cause its random like me. ^-^
*Page 2- This is a tribute to Star Driver, which i started watching this year. It is a new anime this year and it is awesome.
*Page 3- Hetalia Party-season 1. I had a party when i first got the season set. I had a bunch of friends over and we watched all 26 episodes. (They are all 5 minutes) I'm happy I documented this cause it turned into a nice page.
*Page 4 and 5- Sakura Con 2010. The 2nd con i ever want to. On Saturday I cosplayed Edward Elric and sunday I did Haruhi Suzumiya. The pictures on the page were taken by both me and my dad, as we had both cameras. The logo with the flowers was made by me. I took a BLEACH font and then stuck the Sakura Con flowers behind it. I actually put it on a bag i made for the con. My favorite picture is the one with me and Vic Mignogna. He's my Voice Actor Idol.
*Page 6 and 7- Voice Actor signatures. This page was a lot of work cause I needed to crop all the pictures and change the sizes. I moved  most of the signatures around too. It turned out to be a good spread tho. I'm really happy.
*Page 8 and 9- Wasabi Izakaya's. A Japanese resteraunt that the Japanese 12 class went to. The Japanese 11 class that I was in went too, but before 2010 so I didn't include any of those pictures. 
*Page 10 and 11- Something more interresting to say the least. Multiple pictures of the same hand from different angles. I was inspired to re-create Edward Elric's Automail arm coming out of the ground. The reference pictures are on the pages. I my Manga to create  the mound and then my old cosplay arm. I love the way it turned out.
*Page 12 and 13- This spread was a lot of work. It nearly was the death of me. XD. First off I had to check release dates to make sure I bought all of what i photographed in 2010, plus remembering WHEN I bought things with older release dates. That in itself was a job and a half -laugh- and then photographing them... I tried to make them all strait on to the camera, and that worked for the most part. Plus not catching the glare on any of the covers from the light I was using was hard too, XD and to boot  i used an old  woodenVCR cover to prop up the books and DVD's. THEN came the cropping and level changing. ALL the levels were messed up cause my house has terrible light. Needless to say I think this took way too long, but the end product looks AMAZING. And the totals... God i spent a lot this year on just Anime and Manga. Theres a whole bunch more in ketchains, plushies and wallscrolls.
*Page 14 and 15- My Alphonse Elric figure. I got him at Kinokuniya bookstore in Seattle Washington this summer. The Quote is from Vic Mignogna's song, Nothing I Won't Give, which is related to FullMetal Alchemist. I used the flash at a close range in the picture to make Al look more reflective. He is supposed to be metal afterall.
*Page 16- The mini Edward Elric figure I got at Sakura Con 2010. Cropping him was fun. The quote is from a FullMetal Alchemist episode. Episode 2 of Brotherhood if i remember correctly. 
*Back Cover- This quote is from the last chapter of FullMetal Alchemist. This chapter was released on June 10th 2010. FMA is my all-time favorite manga. I'm happy I was able to put this quote in my book. I will never forget FMA and this quote actually made me cry when i first read the chapter. And this concludes my book. ^^
Tuesday, November 30, 2010

Green Screen work

Green Screen Image~~~
So first I took this photo in the morning of some fall day... back before the snow fell. XD
I touched it up a bit and then took the green screen photo.
Exctracting the file properly and getting it cropped right took a while, but it turned out really well.
I softened up the image around the edges to make it look more natural.
Then i made my eyes bluer cause I wanted to. lol.
Flattened the image and saved it. TADAH! GREEN SCREEN STUFF! ^^

Friday, November 5, 2010

Booklet Theme

By booklet's theme is going to be Anime and Manga.
I want to incorporate that in to every one of my photos. (weather it be a costume or a pose, or an item of some sort)
I realize this is a broad theme, but i dont want to just focus in on figure photography. (But i DO want to do some)

Questions:
~How do I set up figures in an interesting manner, even if they do not have movable limbs?
~How do I make it look like the figures are interacting?
~How would I take intersting pictures of myself using the timer function, and still make sure they look good and don't cut things off(if i don't want it to)?
~How do i go about taking a figure photo and not making it look staged?(i don't want a white backdrop please!)

Wednesday, November 3, 2010

Self Makeover

took the picture(Mr.Tonn did anyways)
It was 1-2 light.
Then in photoshop, I used the protocols and then turned the image grayscale. Then i created a new layer and blurred that one. then used the erase tool (on 30% opacity) to bring back in the details of the hair, eyes, lips and eyebrows.

Thursday, October 28, 2010

Exam Question

How do you eliminate blur?
a) Change F-stops
b) Change Shudder Speed
c) Zoom in/out
d) Change ISO

High Contrast

3rd times the charm , eh? Well finally on my third try on this, it finally works!
I had the light about a meter away from her, and a little behind (not much tho) and the reflector in front a little, replecting the light up.
I used the protocols as usual. And thats about it ^^ I used the Curve a little, but it was pretty good the way it was already.
I'm glad it finally worked!

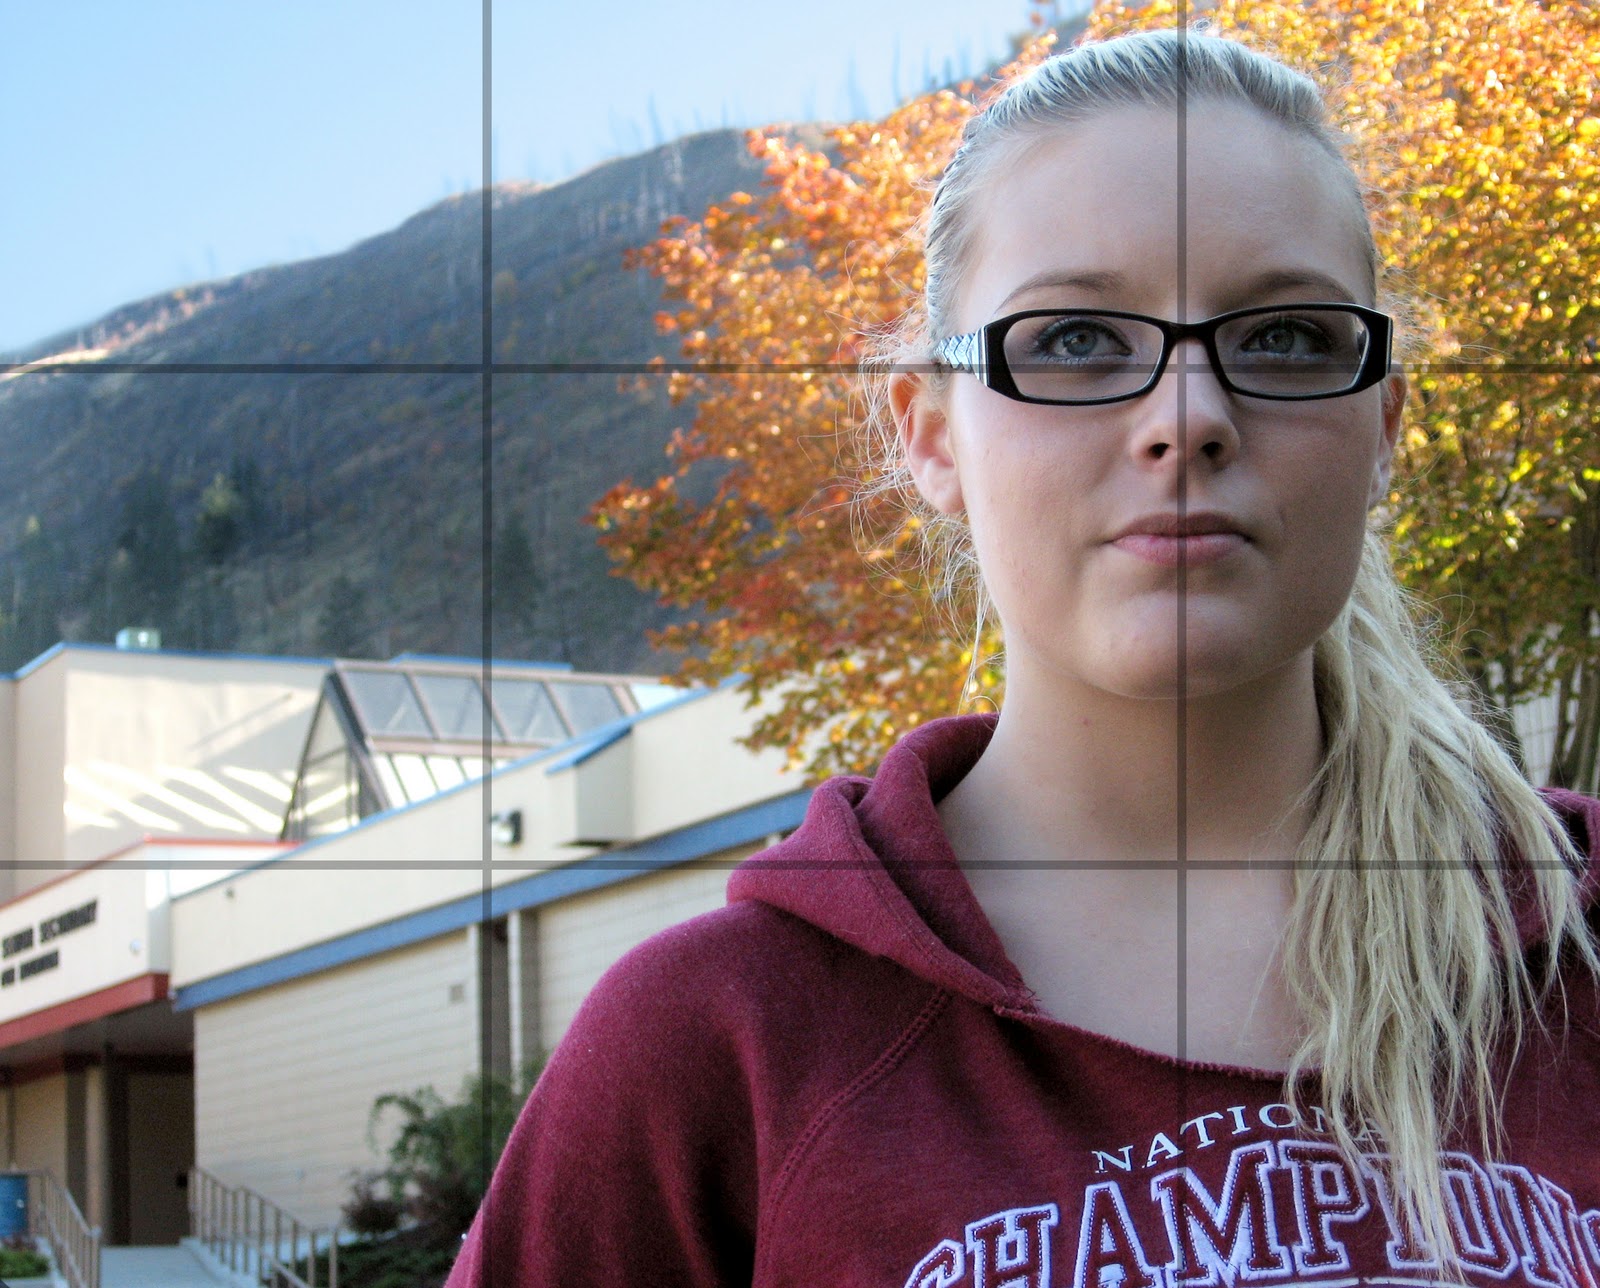
A-Assignment: Layers+Depth Of Field+Rule Of Thirds+Fall Theme

For this, I first did the Protocols. The image was quite dark so i lighened it a little and used the curve.
The Layers came in with the sky. The color had nearly washed out with all of what I did, so I created a new layer(From the original Image) and erased all but the sky. So the sky is now blue(from the original) and not nearly white. ^^
The Depth of Feild comes in with the background. I originaly shot the picture just for the assignment of Depth Of Feild, but I got a better one for that. So I used this one here. I like the way the background blurred.
Lexee is more to the right, so thats where the Rule Of 3rds comes in.
It is Fall Theme because theres a yellow, orange and red tree in the background.

Depth Of Feild

I took Lexee out to the MPR, set a low F#. Then I zoomed in a little, and focused on Lexee, making the background blur. Then with Photoshop, I used the protocols and then used the color replace brush and made her eyes a more bright blue. Then I took out the color from the rest of the image, leaving only the eyes.
Then I made a new layer and Surface Blurred it, and then erased parts to bring back her eyes, hair and lips. I did this because I think it looked better. Then I flattened it, and saved it.

Friday, October 15, 2010

Makeover

First I used the protocols, then I used the Channel Mixer and changed it to Monochrome. I upped the Red and blue a little to bring out details.
Then i removed some spots on the skin using the Spot Healing Brush and the Clone Stamp Tool.
Then I created a new layer from the background and used the Serface Blur on it. Then I used the erase tool, with a low flow and High Opacity to bring back in the eyes, eyebrows, and lips.
Then i flattened the image and saved it.

Wednesday, October 6, 2010

Fall Light+Layers+Duo-tone+Rule Of 3rds


First off, I used the protocalls to fix up the image.
2nd, I made 2 layers and blured the background.
Then i cropped the image and added the rule of 3rds lines in a new layer.
Then i sponged the color out from my background and blurred the edge of the foreground.
Then i created a new layer in front of the background but behind the foreground. I made that layer blue, turquoise and green, blended that together and changed the opacity so the background showed through. So its basically a gradient duotone in the background.
Then i flattened the image and saved it.

Monday, October 4, 2010

Summer Light

Even though this was not required, i did it anyways.
These were captured in the morning.
Taken in my backyard and on my street.
I used the sun and shadows to take these(as that was the assignment)